
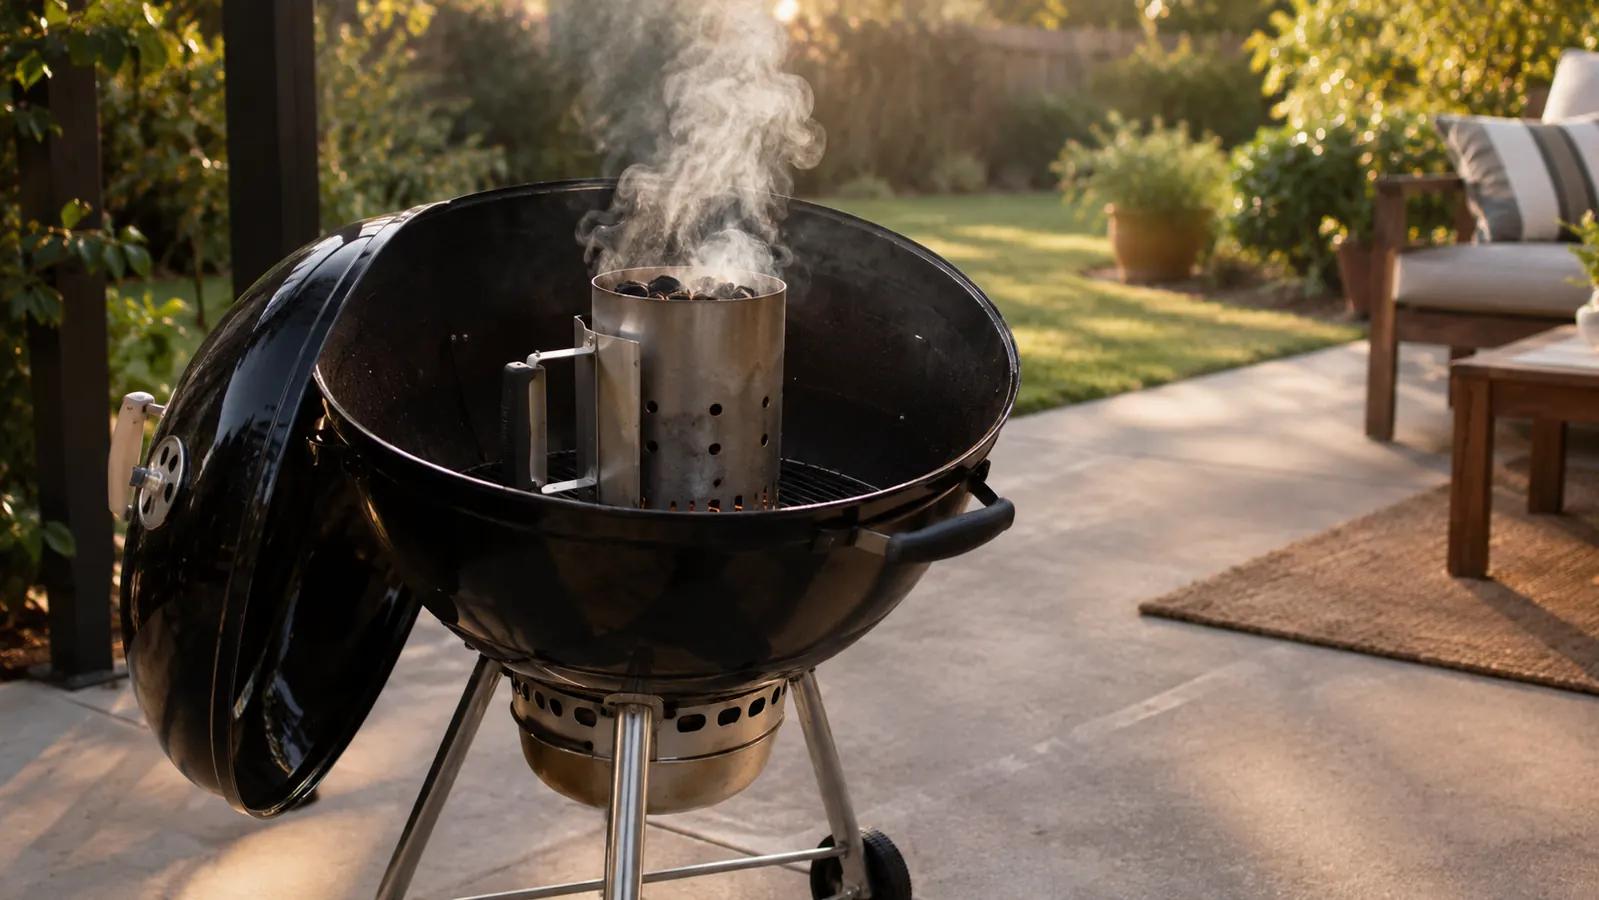
If you have ever stood over a kettle grill with a book of matches and a bag of charcoal, wondering why the coals are still black after ten minutes, you already know the problem this solves. Lighting charcoal with a chimney starter is the most dependable method I have used in decades of backyard cooking, and it does not take special skill. You need a chimney starter, a Weber kettle with its dampers open, and about twenty minutes before you put a single burger on. No lighter fluid, no tower of newspaper balanced on the grate, no standing there fanning the coals with a lid.
I am Hank Dorsey, a retired HVAC technician from Lee's Summit, Missouri. I have cooked on a Weber Original Kettle 22-inch for most of my adult life, and the current one has been on my covered patio for about six years. What follows is the exact routine I use when I want a full chimney of glowing coals without lighter fluid, without a blowtorch, and without standing there fanning the thing. It is the same method I taught my kids, and the same one I still use every Sunday when they come over with the grandkids.
The grill that makes this method easy: the Weber Original Kettle 22-Inch
The 22-inch kettle gives you a 363-square-inch cooking surface, a durable-plated steel cooking grate, and the One-Touch cleaning system that makes ash cleanup quick when the cook is done. Weber kettles are what I have cooked on for decades, and this is the one I would buy again today. Check today's price on Amazon before you decide.
Amazon Check Today's Price on Amazon →Why a Chimney Starter Works
A chimney starter is a metal cylinder with a grate inside and a wire handle on the outside. You fill it with charcoal, light the fuel from the top, and the cylinder turns into a small chimney. The fire draws air up through the bottom, the coals catch from the top down, and in about fifteen minutes you have a full load of glowing charcoal ready to dump onto the lower grate.
The reason this beats other methods is airflow. A pile of charcoal on a flat grate has no draft, so it smolders and takes forever. A chimney starter gives the fire a column of air, the same way a furnace flue pulls heat through a house. I spent thirty years working with airflow as an HVAC technician, and I can tell you that the chimney starter is the closest thing to a controlled burn you will get in a backyard grill.
Step 1: Start with a clean lower grate and open the bottom dampers
Before you light anything, make sure the lower grate is clear of last cook's ash. The Weber kettle's One-Touch cleaning system is made for exactly this: sweep the blades back and forth and the ash drops into the aluminized steel ash catcher below. A clear airway matters more than people think. Charcoal needs oxygen to light, and a clogged grate starves the fire before it starts.
Open the bottom dampers all the way. On the Weber Original Kettle, the bottom damper is the vent under the charcoal grate, and the lid has its own top damper. Both need to be open for the chimney starter to work. I open the top damper too, even though the lid is off for now, because the draft starts pulling through the chimney the moment the coals catch.
Set the chimney starter on the lower grate, centered. The cylinder has a wire handle and a grate inside that holds the charcoal. You want the chimney sitting level so the coals do not spill when you lift it later. If the grill is on a slope, turn the whole kettle so the chimney sits flat.
Step 2: Fill the chimney with charcoal, but do not pack it
Fill the chimney starter with briquettes or lump charcoal, whichever you normally use. Do not cram them in. You want the coals loose enough for air to move between them. A packed chimney lights slower and unevenly, and you will end up dumping half-lit coals onto the grate and waiting another ten minutes for them to catch.
How much charcoal depends on what you are cooking. A full chimney gives you a solid bed of coals for burgers and chicken. For a long low-and-slow cook, I light a full chimney, dump it, and add unlit charcoal on top as the cook goes. The kettle's 363-square-inch cooking surface gives you room to bank the coals to one side if you want indirect heat.
If you are cooking for two, you do not need a full chimney. Fill it two-thirds full and you will have plenty. If you are cooking for the whole neighborhood, light two chimneys and dump them both. The chimney starter does not care how much you put in it, as long as you leave room for air.
Step 3: Light the charcoal from the top and let the chimney do the work
This is the part that surprises people. You do not light the chimney from the bottom. Crumple two or three sheets of newspaper, push them into the top of the chimney so they sit on the charcoal, and light the paper. The flames draw downward through the coals, pulling air up through the bottom of the chimney, and the coals catch from the top down.
Leave the chimney alone for about fifteen minutes. It is tempting to poke at it, but every time you lift the chimney you lose the draft and have to start over. You will see the coals glow red through the holes in the cylinder, and the smoke will turn from white and thick to thin and blue. That is the sign that the coals are ready to dump.
If the coals are still mostly black after twenty minutes, the usual cause is a blocked airway. Check that the bottom damper is fully open and that the lower grate is not clogged with ash. On a windy day, set the kettle so the breeze hits the bottom vent, not the top of the chimney. Wind hitting the top of the chimney pushes the draft back down and smothers the fire.
Step 4: Dump the coals and spread them for your cook
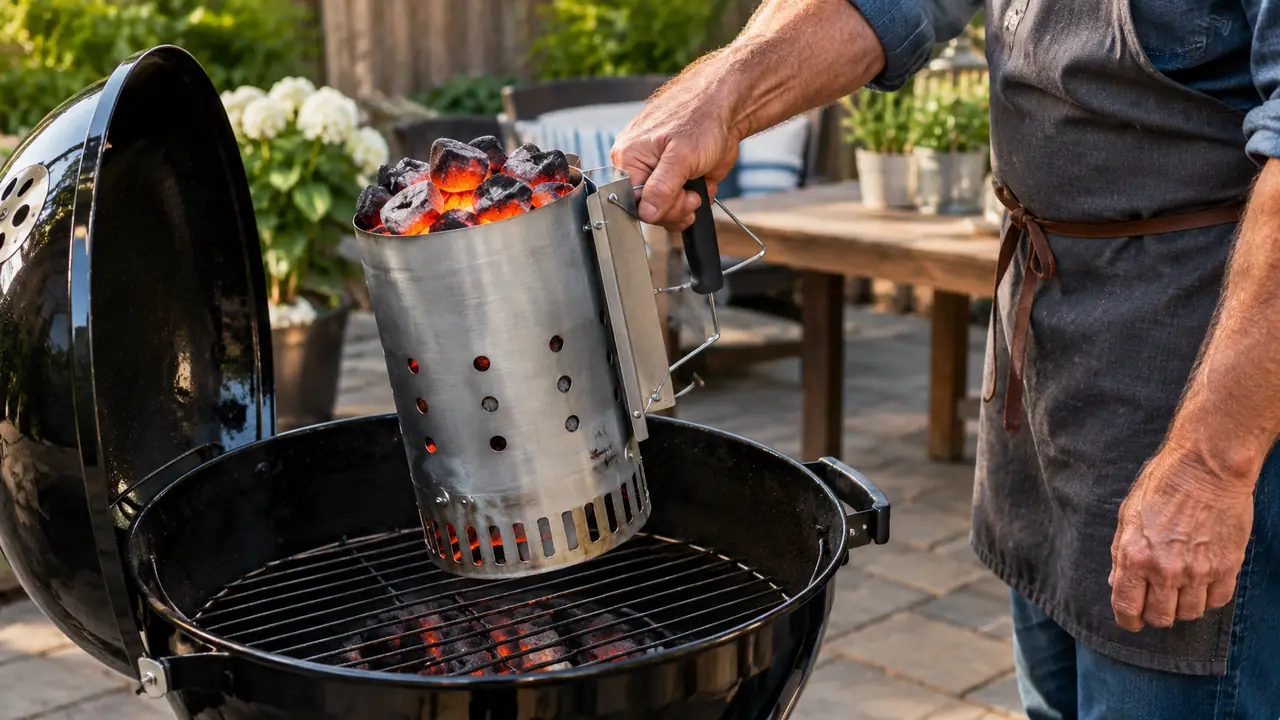
When the coals are glowing and covered with a light gray ash, put on a heat-resistant glove, grab the chimney by the wire handle, and lift it straight up. Set it down on the concrete patio for a moment, then dump the coals onto the lower grate. Tilting the chimney as you lift it will spill coals, so lift it level and set it down before you tip it.
For direct heat, spread the coals evenly across the grate. For indirect cooking, bank them on one side and put a drip pan on the other. The Weber kettle's precise heat control comes from the two dampers: use the bottom damper to add air when you need more heat, and close it halfway to bring the temperature down. The dampers are your throttle, and they respond within a minute or two.
Step 5: Set the lid, dial in the dampers, and wait for the temperature to settle
Put the lid on with the top damper open, and give the grill ten minutes to settle. The kettle will overshoot at first, then come back down as the coals even out. I check the temperature with a MEATER Plus wireless thermometer, and I wait until the temperature stops moving before I put food on. Lifting the lid every thirty seconds to peek is the fastest way to turn a good fire into a mediocre one.
For burgers and hot dogs, I let the kettle run hot, around 400 to 450 degrees. For chicken and pork, I back the bottom damper down to about half and let it settle around 350. For low and slow, close the bottom damper to about a quarter open and hold the temperature around 250. The porcelain-enameled lid and bowl hold the heat so the temperature stays where you set it, and the One-Touch cleaning system makes the ash cleanup quick when the cook is done.
When the coals are dumped, set the hot chimney starter on the concrete patio and let it cool. Do not put it back on the grill while it is hot, and do not rinse it with water while it is hot, because the metal will warp. I tap mine against the patio to knock out the few ashes that are left, and I store it in the garage with the charcoal.
How to Use the Coals Once They're Lit
Once your coals are dumped and spread, you have about forty-five minutes of good cooking heat before you need to think about adding more charcoal. For burgers and hot dogs, that is plenty. For chicken, pork, or a rack of ribs, you will want to bank the coals to one side and cook over indirect heat, with a drip pan under the meat.
When the coals start to fade, add unlit charcoal to the edge of the fire, not the middle. It will catch gradually and keep the temperature steady. The Weber kettle's 363-square-inch cooking surface gives you room to work, and the dampers give you control. That is the whole system: air in the bottom, heat out the top, and coals that last as long as you need them.
Common Mistakes That Keep Your Coals from Catching
The first mistake is lighting the chimney from the bottom. I have seen people hold a lighter to the holes in the side of the cylinder, and it never works well. The fire needs to burn down through the coals, not up from underneath. Light the newspaper on top and let the draft do the work.
The second mistake is using too much newspaper. Two or three sheets is plenty. A whole section of the Sunday paper stuffed into the top of the chimney will flare up, push smoke everywhere, and then die before the coals catch. Keep it light and let the charcoal do the burning.
The third mistake is rushing. People dump the coals the moment they see a flame, and then they spend twenty minutes waiting for half-lit briquettes to catch on the grate. Wait until the coals are glowing and covered with gray ash. That is the difference between a chimney starter and a pile of wet-looking charcoal.
What Else Helps
A chimney starter is not the only tool that makes kettle grilling easier, but it is the one I reach for first. Keep a pair of heat-resistant gloves near the grill so you are never tempted to grab the chimney with a dish towel. Use a wireless thermometer like the MEATER Plus to track the cook without lifting the lid, because every time you lift the lid you lose heat and add minutes to the cook.
Cleanup is where the Weber kettle earns its keep. The One-Touch cleaning system sweeps ash into the ash catcher, and the porcelain-enameled lid and bowl wipe down easily. I brush the cooking grate with a GRILLART bristle-free brush after every cook, and I empty the ash catcher when it is about half full. A clean grill lights faster, and that is the whole point.
One more thing: keep your charcoal dry. A bag of briquettes that has sat open on a damp patio will soak up moisture and take twice as long to light. I keep my charcoal in a plastic bin with a lid, and I bring the chimney starter inside when I am done. It is a simple habit, and it saves more frustration than any gadget.
The first time I used a chimney starter, I stood there waiting for the coals to catch, and they did, in about fifteen minutes, with no lighter fluid and no fuss. That was the day I stopped lighting charcoal any other way.
What to Know Before You Buy a Chimney Starter
A chimney starter is a simple metal cylinder, and the differences between models mostly come down to gauge of steel and handle comfort. The one I use has held up for years on my patio, and the wire handle stays cool enough to grip with a glove. Look for a model with a solid grate inside and a handle that does not wobble.
One honest note: a chimney starter lights a full load of charcoal in about fifteen minutes, but it is not faster than a gas starter or an electric starter. What it is, is dependable and cheap, and it does not leave any chemical taste on the coals. If you cook on a Weber kettle, this is the method I would start with.
You do not need to spend much to get a good chimney starter. The important thing is that it fits your grill and that the handle is comfortable. I have used the same one for years, and it still sits on the lower grate of my Weber kettle every time I cook. Buy a decent one once, and you will not think about it again.
The Bottom Line
Lighting a charcoal grill with a chimney starter is not complicated, but it does reward a little patience. Start with a clean grate, open the dampers, fill the chimney loose, light from the top, and wait for the gray ash. In about twenty minutes you will have a full bed of glowing coals, and you will not have touched a bottle of lighter fluid. A Weber kettle is the grill I have done this on for decades, the Original Kettle 22-inch is the one I cook on now, and it is the one I would recommend to anyone who wants to cook over charcoal without the fuss.
Ready to cook? The Weber Original Kettle 22-Inch is the grill to light it in
The 22-inch kettle gives you the space, the heat control, and the easy cleanup that make chimney-starter lighting worthwhile. Check today's price on Amazon and see for yourself.
Amazon Check Today's Price on Amazon →